It’s that time of year again! Summer is just around the corner and BASE jumpers all over the world are pulling their gear out of the closet for the first time in months.
You went hard last year. Maybe you took a couple of trips, made regular visits to your local objects, or perhaps you were caught up in other adventures all season and your gear went largely underutilized. Regardless of your BASE activity level last year, a pre-season inspection is well-advised when it comes to life-saving equipment. So lay a tarp out in the backyard, make space in the garage, or move some furniture around in the living room to clear a packing area. Do whatever you need to do to make sure that your first canopy inspection in 2017 doesn’t occur while you’re in the saddle!
A word of caution: This inspection should be more involved than your standard gear check. If you’ve spent any less than one hour combing over your rig you probably didn’t do a very thorough job. For purposes of comparison, all new Apex canopies are given a 535 point inspection before we ship them out! If you’re not up to spending that kind of time and attention on your rig, we’d suggest you send it to a professional rigger instead of using this guide to pretend that you completed a proper inspection.
Assuming you’re starting with a packed rig, here’s a good checklist to work from. Make sure that the following components are in good condition and without signs of wear, abuse, or any other form of deterioration:
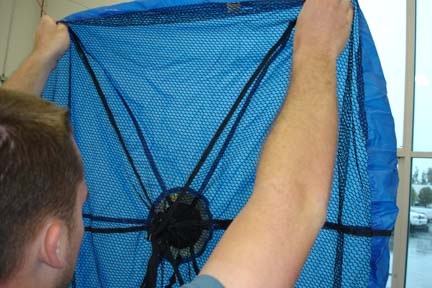
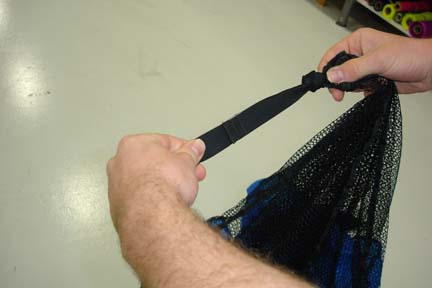
- Pilot Chute: Check the ripstop for holes, burns and abrasions. Holding it up to the light will help expose potential problems. Inspect the mesh for tears. Be sure to inspect the bridle attachment point for wear and that the PC is properly attached with a larks head knot. Remember the PC is the first thing out and the last thing packed. It gets dragged frequently and seems to always end up in a bush or getting stepped on!
- Bridle: Check the full length of the bridle for wear and burns. If you’ve be doing static line jumps then extra attention should be given to check for abrasion and damage. Feel the pins for nicks which can damage your closing loops. Ensure that the pins are securely attached to the bridle and there is no damage to the retaining tab. Imagine for a second that one of your retaining tabs fails and a pin is left in the closing loop while your bridle trails behind you. That’s a bad situation, so pay close attention here.
- Closing Loops & Grommets: Extract the canopy from the container and examine closing loops for appropriate length and condition. While Apex uses all stainless steel grommets, we’ve seen more and more brass grommets coming from other manufactures. Brass is a softer metal and more easily damaged so pay close attention and ensure that there is no damage, nicks, or bends in any of your grommets.
- Harness: Inspect the harness webbing, hardware, and stitching. Look for wear on the webbing. Standard parachute industry hardware is durable but should be inspected for damage, burrs, and rust that may damage the webbing. Aluminum hardware is not a common parachute industry hardware but has become more popular in recent years. It is much more fragile than cadmium and stainless steel and must be inspected carefully as it can crack.
- Risers: Inspect your risers for damage. Make sure that the toggle Velcro is still in good condition and your links (hard or soft) are fastened appropriately. Make sure your 3 rings are assembled correctly and there’s no damage to the white loop.
- Canopy attachment point: Inspect for wear and ensure that your bridle is properly attached to the canopy with a larks head knot.
- Canopy: Before packing the canopy back into the container be sure to take your time and give it a thorough inspection for damage to seams and tears in the fabric. Holes larger than a quarter-inch (2 mm or 2 ripstop squares) should be professionally inspected. Whether or not a patch will be required is not only a function of the hole size, but also its location. Damage in load-bearing areas are more likely to require a patch than a hole on the top skin of an end cell, for example.
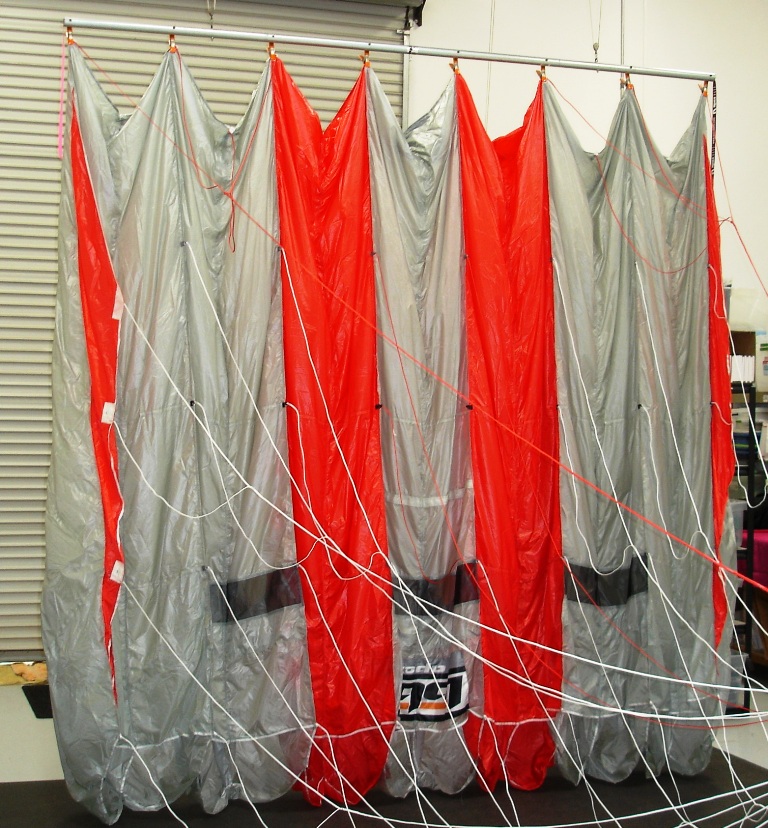
- Lines: Examine each one of your lines top-to-bottom to insure that they are free of damage and excess wear. Be aware that slider-up jumps will wear out your lines significantly faster than slider-off jumps. Check for fraying and melted areas which can result from lines rubbing together during deployment and opening.
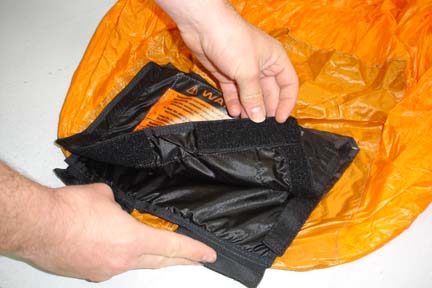
- Tail Pocket: Examine the tail pocket Velcro for wear. Worn Velcro can result in line dump and hard openings which can create malfunctions which may damage canopies, lines, and jumpers. While Apex still offers a traditional tail pocket design, we are firm believers in the Top Loading Tail Pocket which helps prevent line dump malfunctions. More info HERE.
You’re starting to get the idea here. Check everything! This is a single parachute system that you’re trusting with life and limb, so take your time and make sure your gear is in proper working order. You’ll feel a whole lot better on the exit point if you do. Take notes or photos of wear points to catalog them and ask for help if you’re unsure!
Apex BASE offers inspection and repair services. If you would feel more comfortable having a professional BASE rigger inspect your setup before the season starts give us a call and we’ll make sure that you’re good to go!